.pdf
.pdf
Simulate a Building
1. Scenarios creation
Scenarios refer to occupation patterns of how people use a building over time, including how many occupants are present in the different areas of the building, their activities, and when they are likely to be there. These scenarios are essential for accurately simulating and predicting a building’s energy consumption, as they directly affect factors such as heating, cooling, lighting, and ventilation requirements.
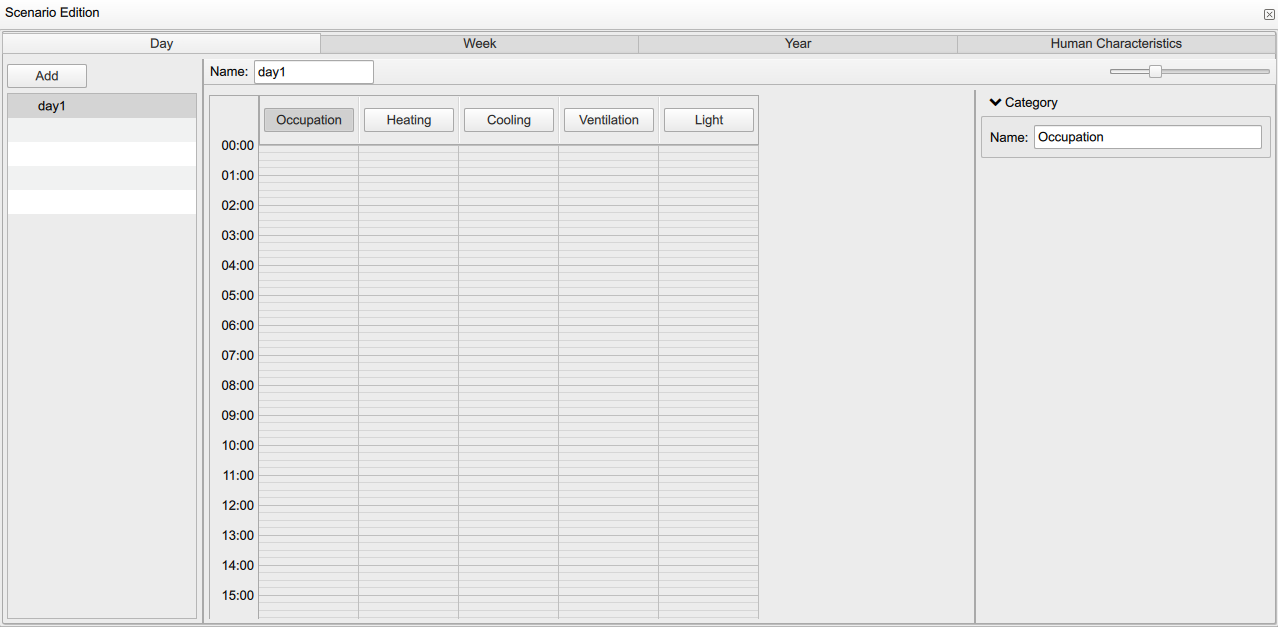
Ktirio-GUI enables filling scenarios for the building of your interest. Click Scenario Edition in the toolbar. In the panel, you can set scenarios by time hierarchy: day, week, year. First, in the "Day" panel, you have to provide a day scenario using 5 types of information such as: "Occupation", "Heating", "Cooling", "Ventilation", "Light". For every field information, you have to indicate the start and end of the occupancy scenario. For example, for a week day, you can choose an occupancy scenario like the following: 00h00→06h00:["Occupation", "Heating"], 06h00→07h30:["Occupation", "Lighting", "Ventilation"], 07h30→18h30:[-], 18h30→22h00:["Occupation", "Lighting", "Heating"], 22h00→00h00:["Occupation", "Heating"]. You can add different scenarios using Add.
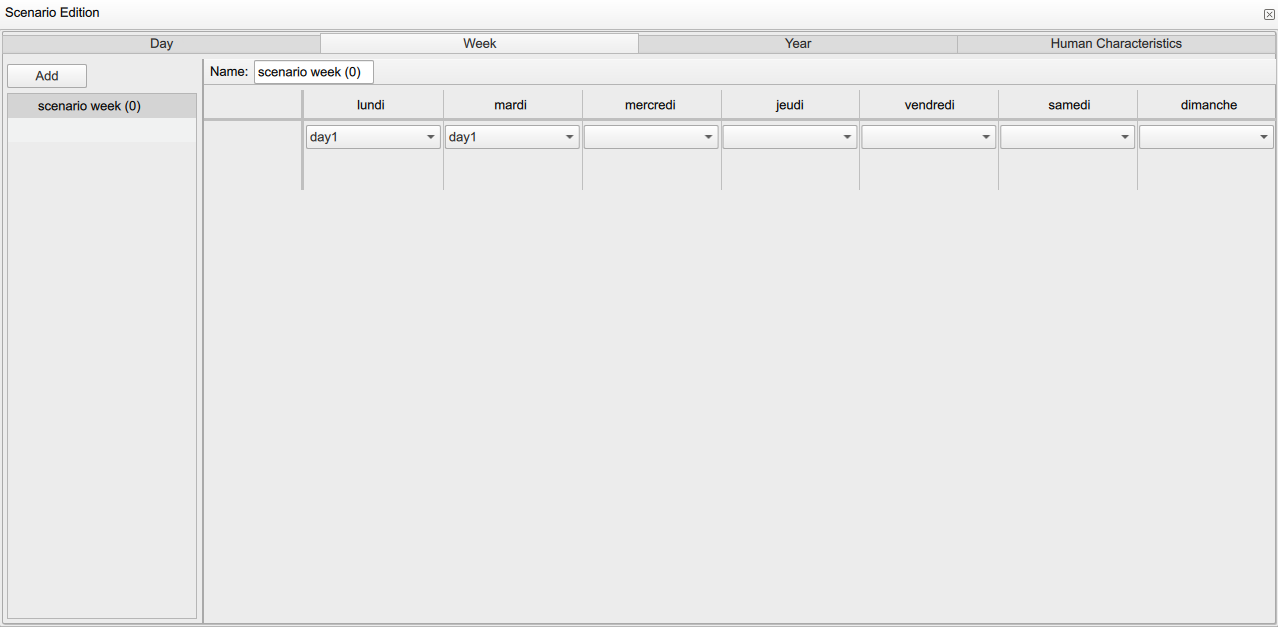
Next, you have to set the week scenario using the created day scenarios. To do so, in the "Week" panel, you can select for each day of the week the corresponding day scenario. You can set different week scenarios using Add, to recognize, for example, a work week and a holiday week.
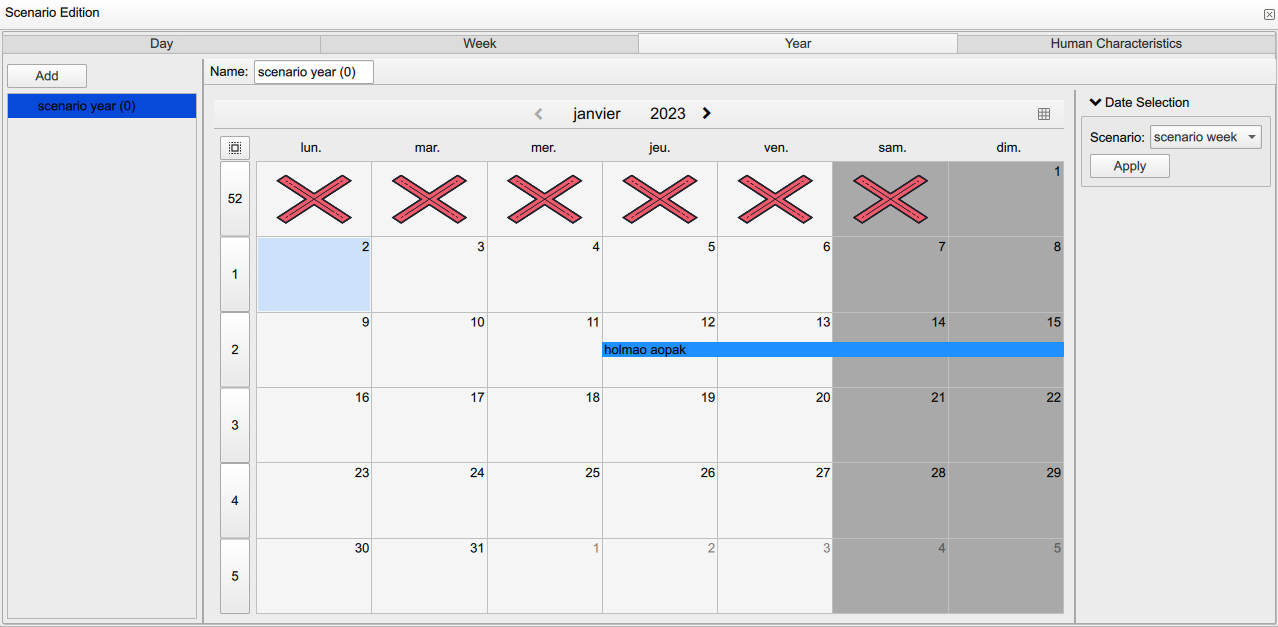
Then, you can set the year scenario using the previous week scenarios. In the "Year" panel, you select for each week of the month, the corresponding week scenario. Similarly, you can create different year scenarios using Add.
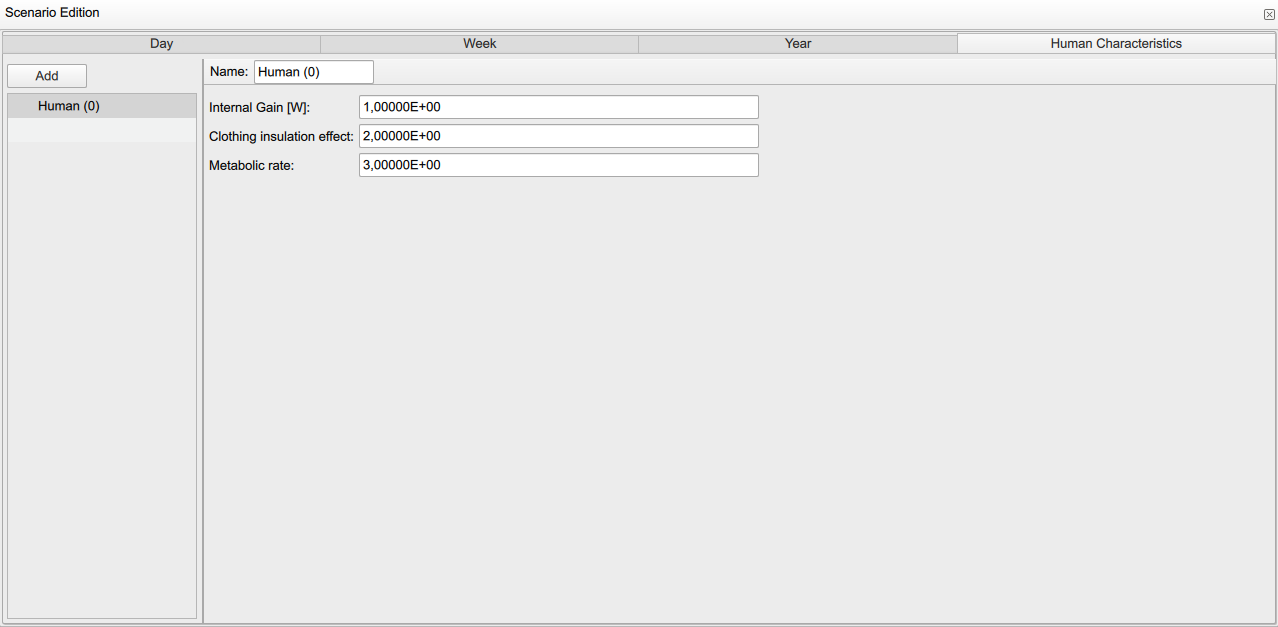
Finally, you can set the occupants physical and clothing characteristics. In the "Human characteristics" panel, you can set information such as: "Internal gain", "Clothing insulation effect" and "Metabolic rate". You can add as many people entries as there are in the building using Add.
2. Setting and running simulation
Here you can set the inputs for the building energy model and run a simulation. Click Simulator in the toolbar. Set the simulator name and type. For a building simulator, choose type “Ktirio-MultiZones”, then click Create. The simulator is created under the Project Browser. When you click on, you can see several information under the "Properties" panel such as: name of the simulator, its Uuid, a simulation block with the button New simulation, the simulator description block and the description of the required inputs and outputs for the simulation. In the Description block, you can see three components: Building, Zones, Outputs. Building shows a summary of the geometry (areas, volumes, counts). Zones lists zone names and indices. Outputs lets you choose “Comfort” or “Performance” data. Configure the simulator parameters. When done, click New simulation. A new properties panel appears.
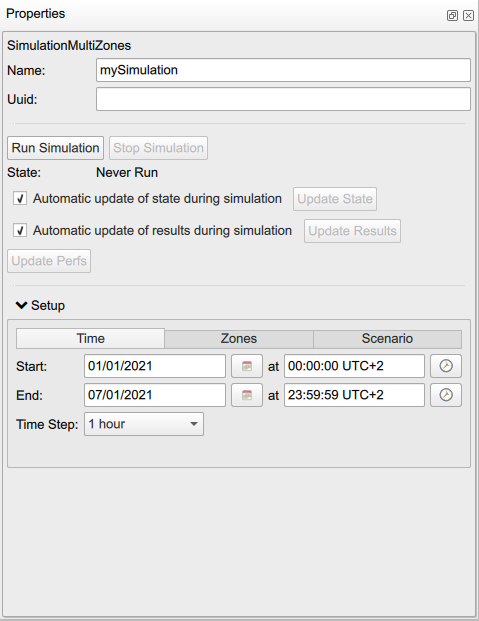
The panel includes parameters and the buttons Run simulation and Stop simulation. It shows the current State, and options for “Automatic update of state during simulation” and “Automatic update results during simulation”. In Setup, set Time (start, end, time step). Moreover, the block Zones allows you to handle the building’s zones and their indexes. Finally, the Scenario block enables you to Edit created occupancy scenarios or Import a scenarios file. When all parameters are set, click Run simulation.
3. Simulation outputs
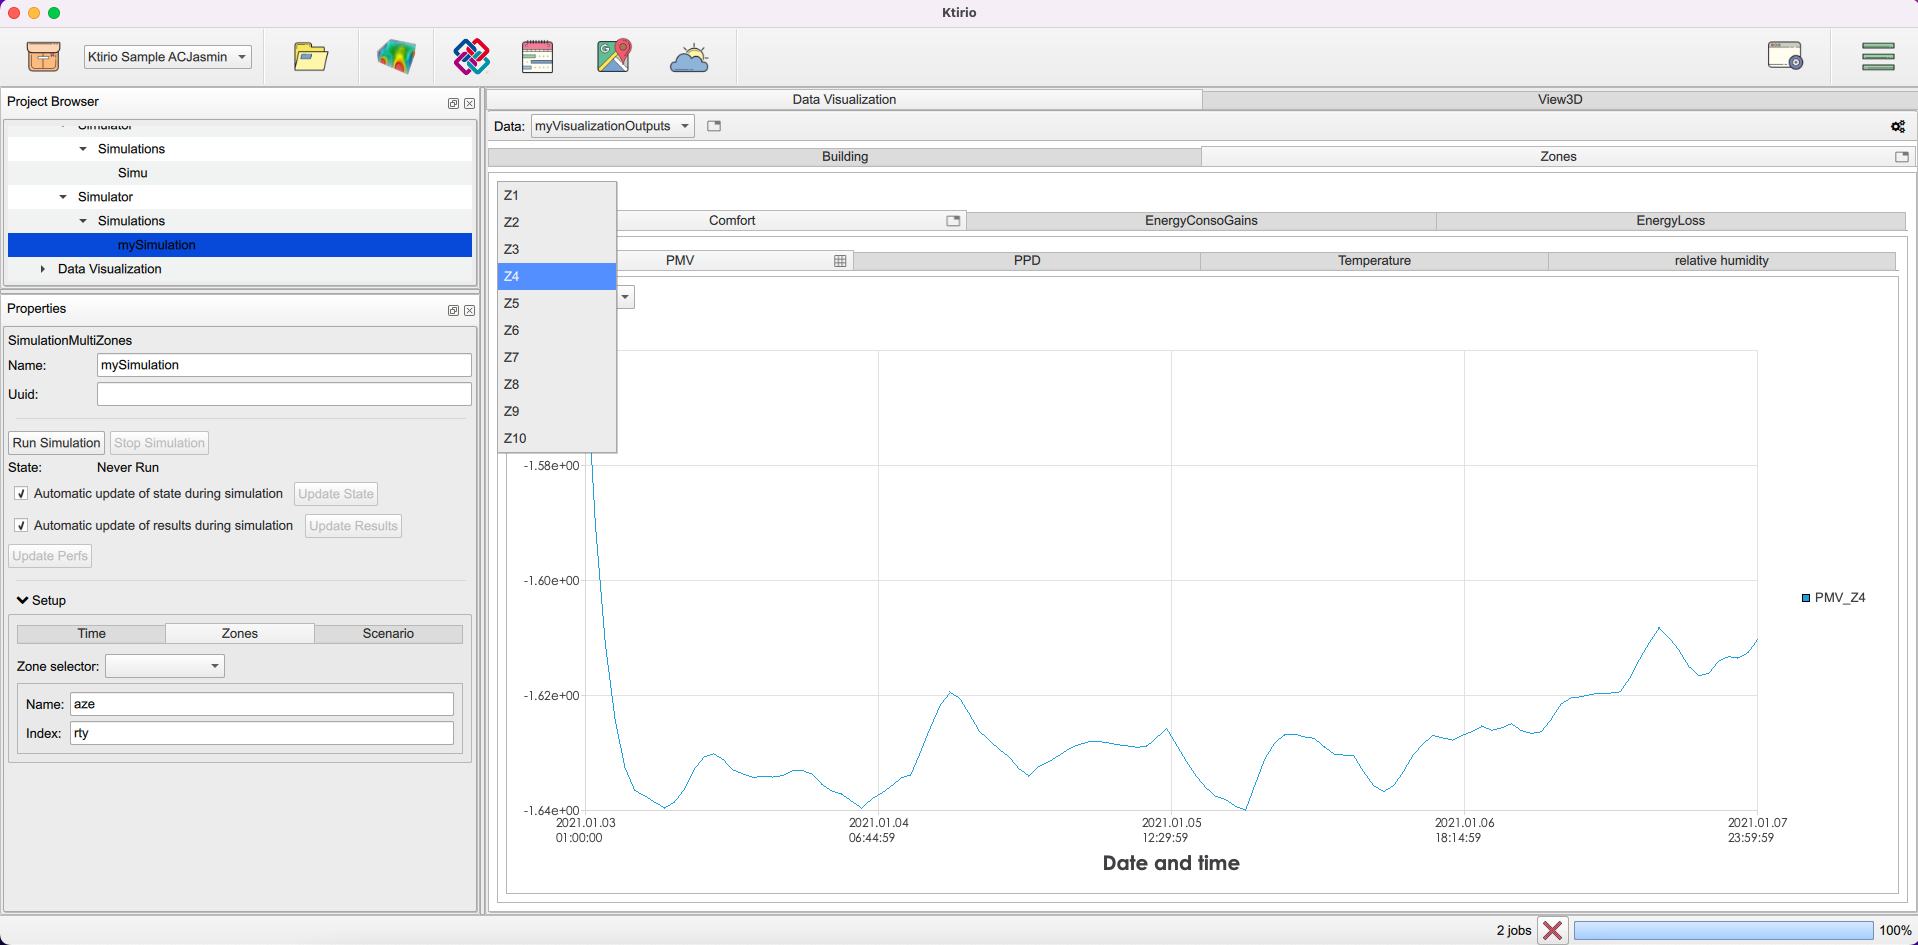
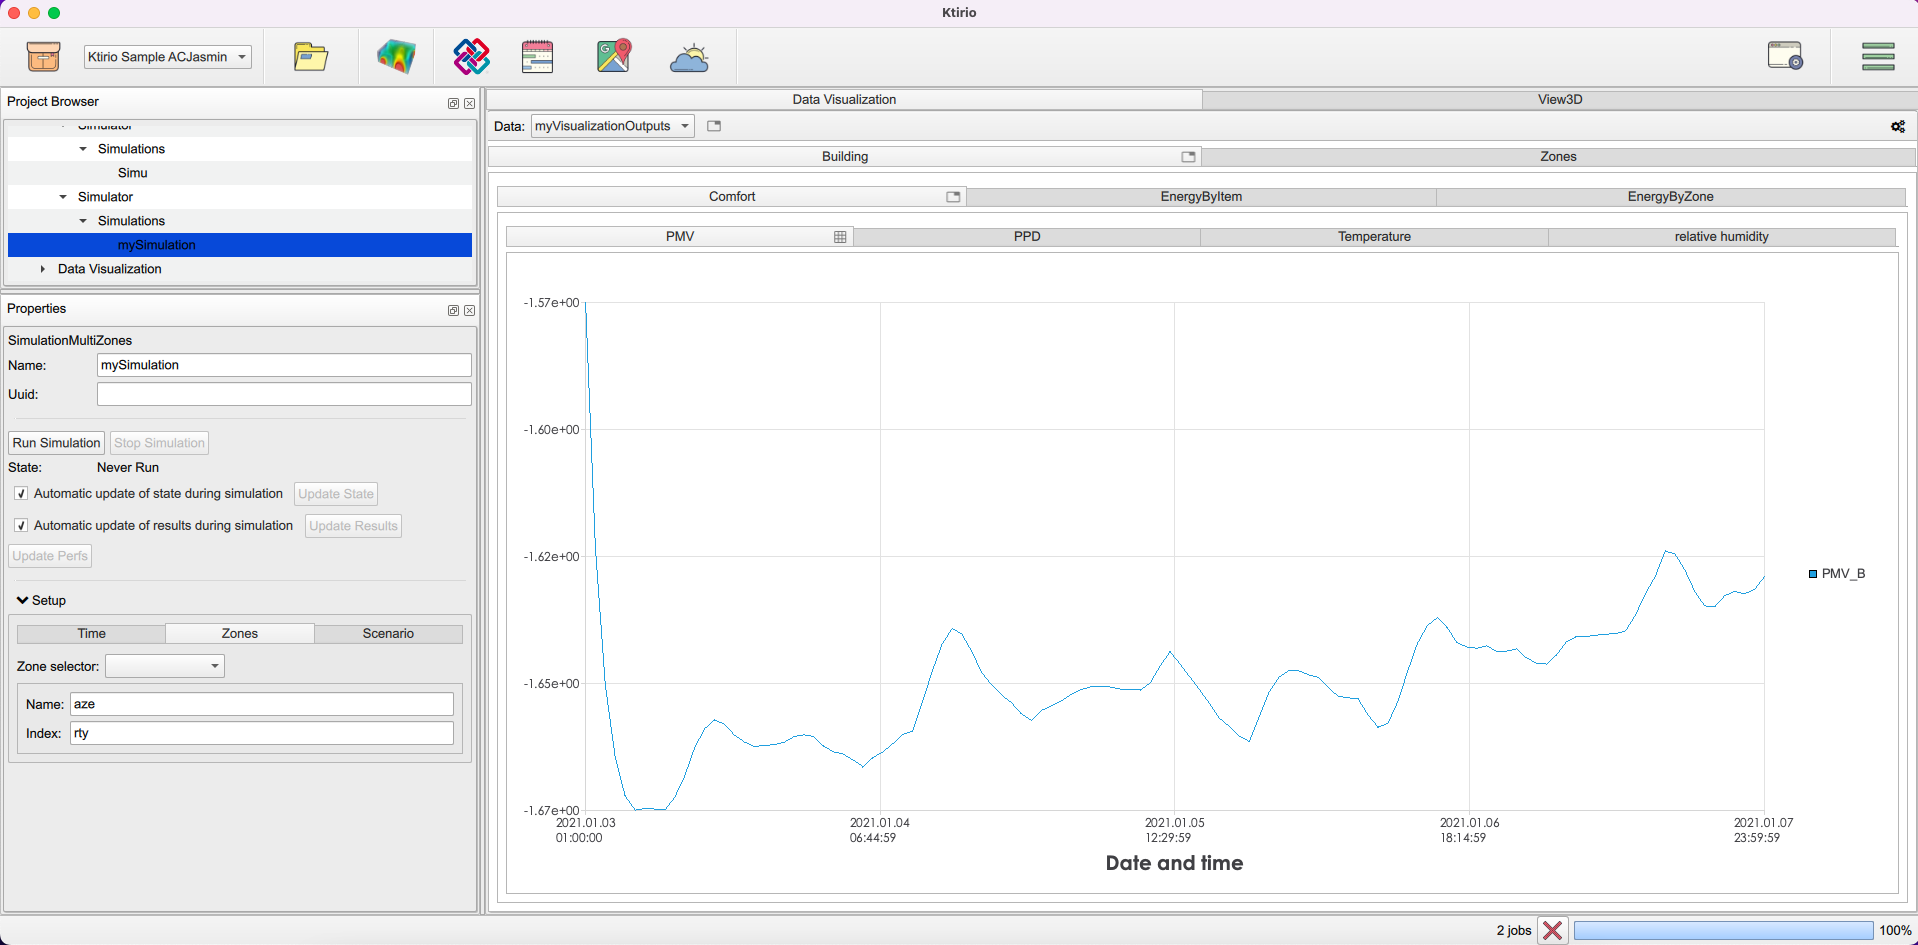
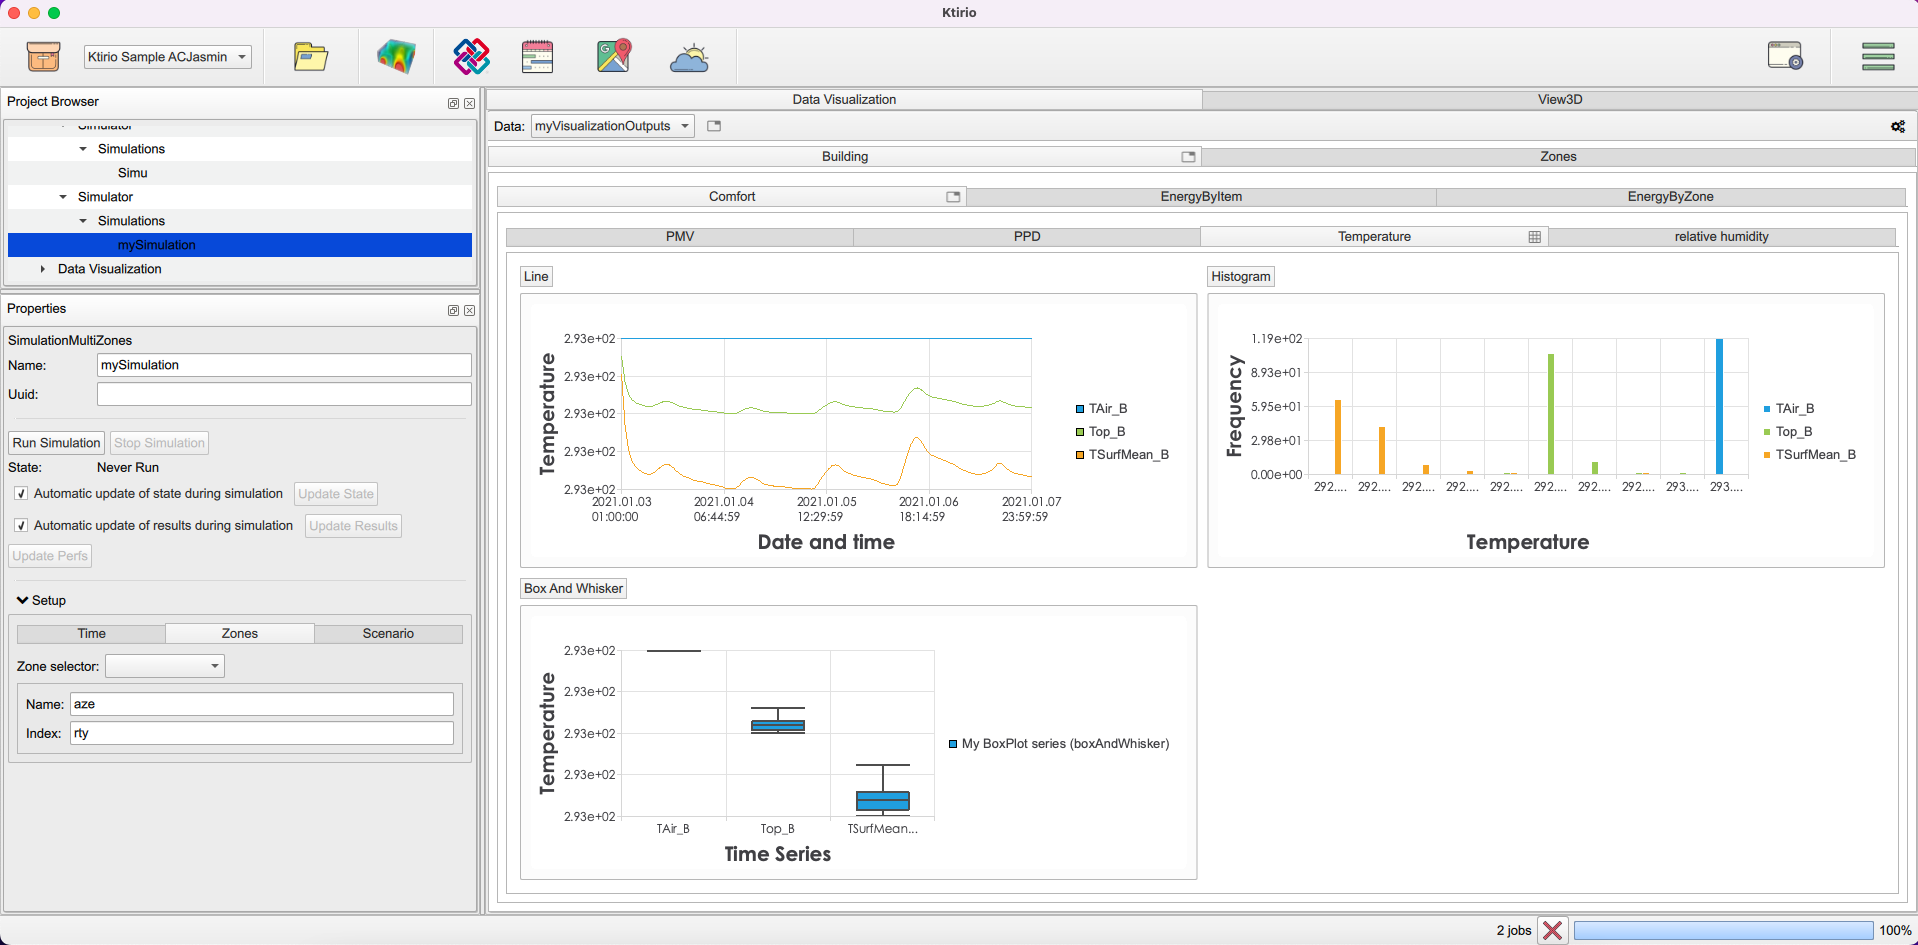
While simulation is running, switch to Data Visualization instead of the 3D view in the main scene. In this panel, you can see graphical representation of simulation outputs drawn as it runs. The graphics are organized in different panels regarding the type of outputs and the building zones. In Data Visualization, you can choose the Building or Zones panel.
In Building, you can show three types of outputs such as "Comfort" outputs, "EnergyByItem" outputs and "EnergyByZones" outputs. Here all parameters are computed for the entire building. For the "Comfort" outputs, "Temperature", "PMV", "PPD" and "Relative humidity" are presented. "EnergyByItem" shows simulated energy "Consumption" and energy "Losses", and "EnergyByZones" displays the "Cooling", "Heating" and "Total" energy. Here is a view on the comfort parameters.
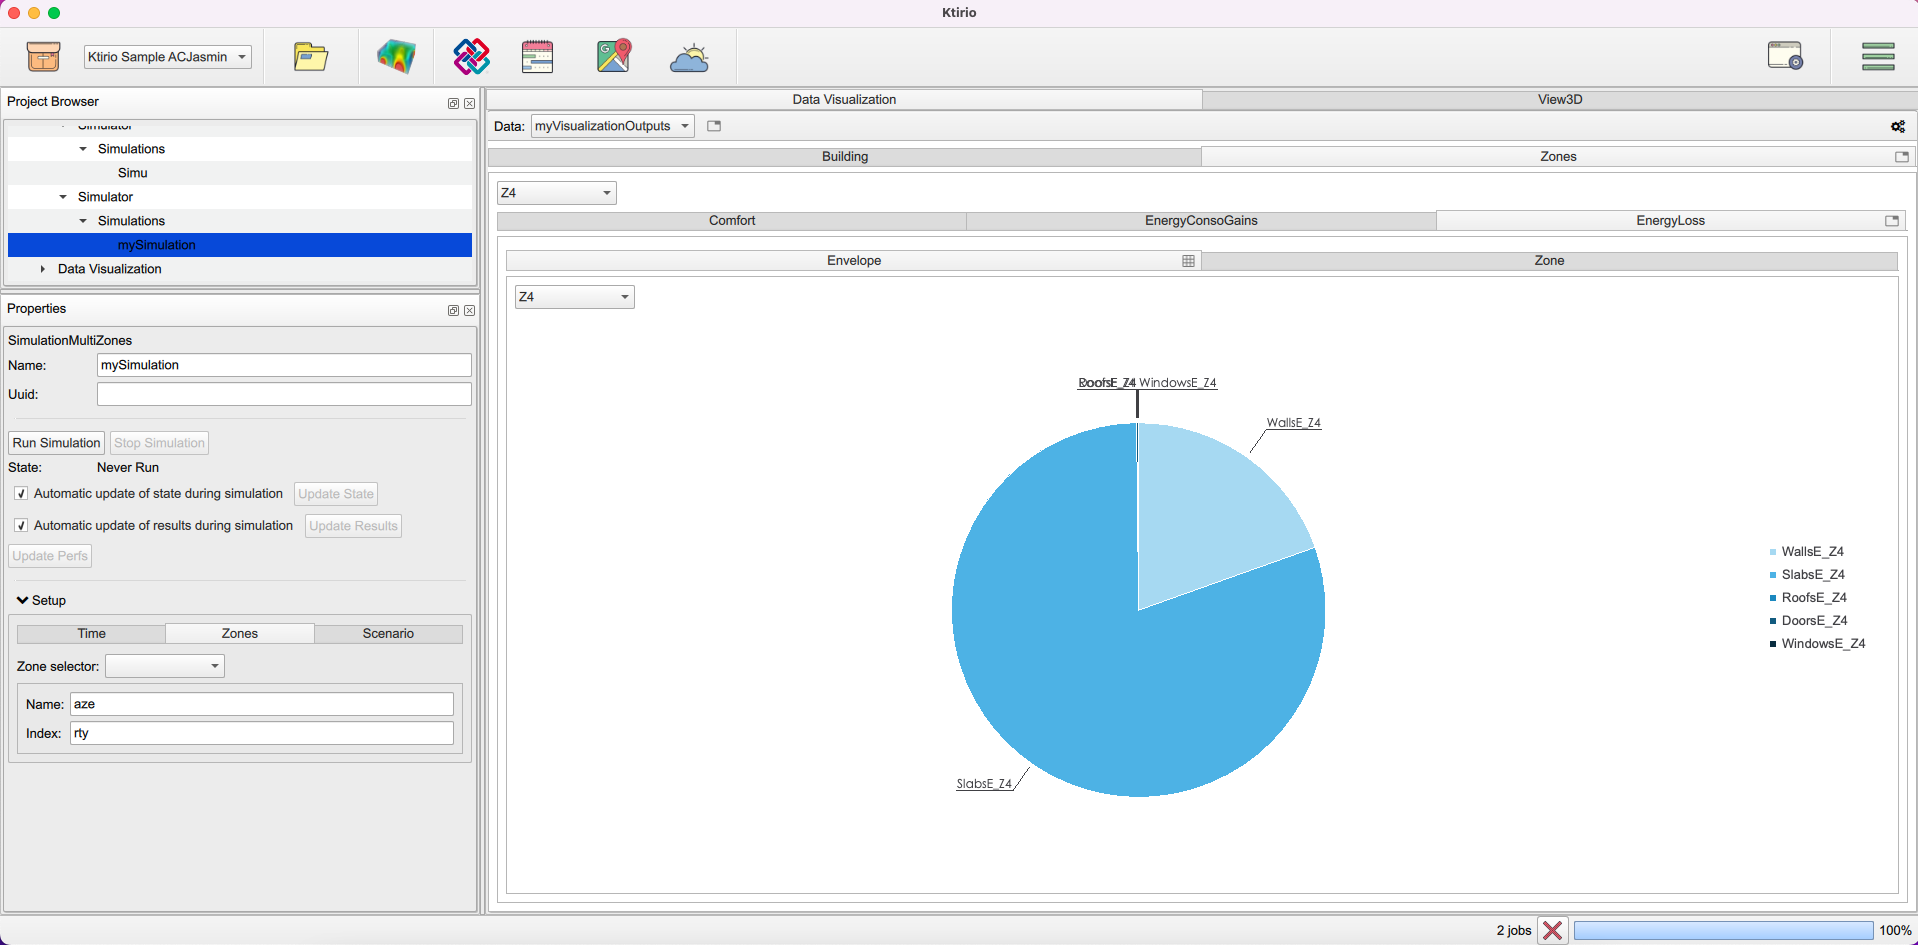
In Zones, the objective is to display the "Comfort", "Energy Consumption" and "Energy Losses" for each building zone. You can select the building zone of your interest in the zone field of the view. The "Comfort" parameters such as "Temperature", "PMV", "PPD" and "Relative humidity" are computed for the selected zone. The "Energy Consumption" includes the "Consumption", the "Gain" and the "Solar Gain" for the selected zone. The "Energy Loss" involves loss by "Zone" and loss by "Envelope".